Depending on how large is your Docker Swarm cluster, you may come across the need to separate your services into specific nodes.
Docker Swarm has an interesting feature out of the box to deal with it and I will demonstrate to you how simple is that!
Applying Label on your Node
The first step to distribute your services in the desired node is applying a label on it.
To apply a label on your node, you just need to specify the flag – – label-add on the update command, like:
docker node update –label-add KEY=VALUE <node-identifier>
Note that KEY and VALUE is whatever you chose to.
In the example above, you could mark the node as production or development, by using something like ENV (key), and PROD/DEV (the value).
Deploying a Service with Constraints
Now with the node labeled properly, we need to specify to our services where it should be deployed.
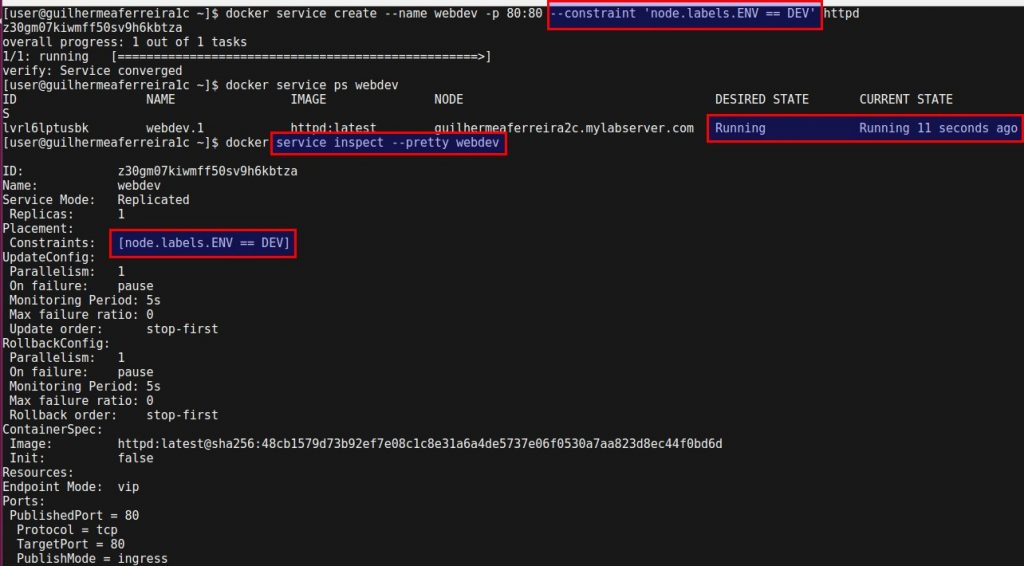
It is easily done by the flag – – constraint, followed by the notation node.labels.KEY == VALUE, all inside a string parameter. For example:
docker service create … –constraint ‘node.labels.key == value‘
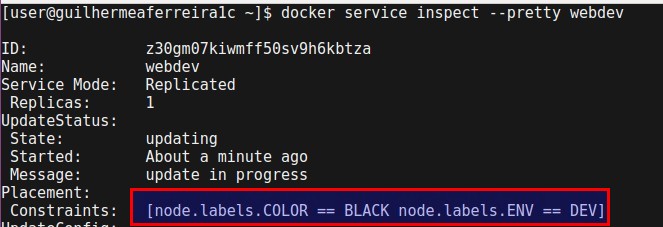
Pay attention to the use of the word labels, in the plural, giving to you a hint that you can have more than one label per node. When applying a group of labels, the constraint parameter will work in a “AND” fashion, meaning that all the items will be validated at the same time, before successfully deploying it.
To change the constraint applied previous to your service, you can run the Docker Service Update command with either –constraint-add or —constraint-rm flags.
It’s pretty intuitive, being -add to insert new elements and -rm to remove.
docker service update … –constraint-add ‘node.labels.key == value‘ <service-identifier>
or
docker service update … –constraint-rm ‘node.labels.key == value‘ <service-identifier>
Checking the Results
If you followed the instructions above, you should already have your services being deployed in whatever node you specified by the labels.
One nice way to confirm that your node got the proper labels is by using the – – pretty flag, while inspecting a command.
docker node inspect –pretty <node-identifier>
or
docker service inspect –pretty <service-identifier>
The result from these commands will display the information in a “TAB” format, instead of the standard JSON.
Lastly, I have attached a few screenshots of these commands that may be useful for you to have a quick look.


